Maintenance
Warning
The customer does not need to open the rc_visard’s housing to perform maintenance. Unauthorized opening will void the warranty.
Lens cleaning
Glass lenses with antireflective coating are used to reduce glare. Please take special care when cleaning the lenses. To clean them, use a soft lens-cleaning brush to remove dust or dirt particles. Then use a clean microfiber cloth that is designed to clean lenses, and gently wipe the lens using a circular motion to avoid scratches that may compromise the sensor’s performance. For stubborn dirt, high purity isopropanol or a lens cleaning solution formulated for coated lenses (such as the Uvex Clear family of products) may be used.
Camera calibration
The cameras are calibrated during production. Under normal operation conditions, the calibration will be valid for the life time of the sensor. High impact, such as occurring when dropping the rc_visard, can change the camera’s parameters slightly. In this case, calibration can be verified and recalibration undertaken via the Web GUI (see Camera calibration).
Updating the firmware
Information about the current firmware image version can be found on the
Web GUI’s System tab
in the System information row.
It can also be accessed via the rc_visard’s
REST-API interface
using the GET /system request. Users can use either the Web GUI or the REST-API
to update the firmware.
Warning
After a firmware update, all of the software components’ configured parameters will be reset to their defaults. Please make sure these settings are persisted on the application-side or client PC (e.g., using the REST-API interface) to request all parameters and store them prior to executing the update.
The following settings are excluded from this and will be persisted across a firmware update:
- the rc_visard’s network configuration including an optional static IP address and the user-specifed device name,
- the latest result of the Hand-eye calibration, i.e., recalibrating the rc_visard w.r.t. a robot is not required, unless mounting has changed, and
- the latest result of the Camera calibration, i.e., recalibration of the rc_visard’s stereo cameras is not required.
- Step 1: Download the newest firmware version.
Firmware updates will be supplied from of a Mender artifact file identified by its
.mendersuffix.If a new firmware update is available for your rc_visard device, the respective file can be downloaded to a local computer from http://www.roboception.com/download.
- Step 2: Upload the update file.
To update with the rc_visard’s REST-API, users may refer to the
POST /system/updaterequest.To update the firmware via the Web GUI, locate the Software Update row on the System tab and press the Upload Update button (see Fig. 54). Select the desired update image file (file extension
.mender) from the local file system and open it to start the update.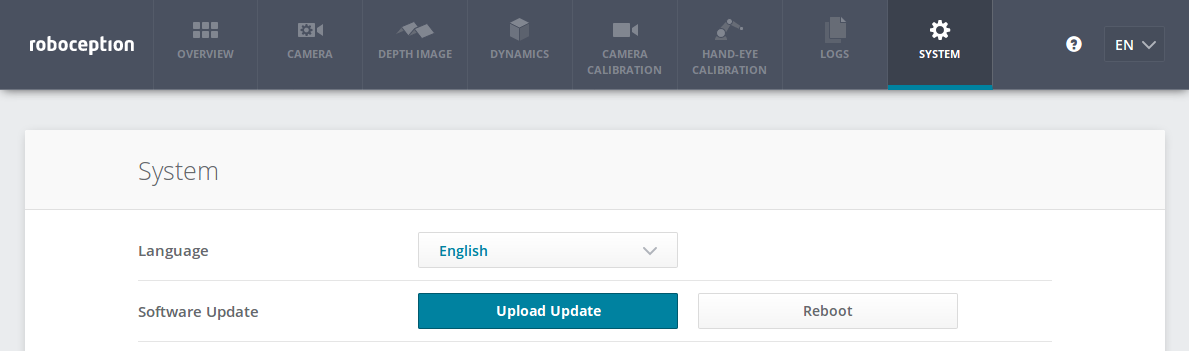
Fig. 54 Web GUI System tab
Note
Depending on the network architecture and configuration the upload may take several minutes. During the update via the Web GUI, a progress bar indicates the progress of the upload as shown in Fig. 55.

Fig. 55 Software update progress bar
Note
Depending on the web browser, the update progress status shown in Fig. 55 may indicate the completion of the update too early. Please wait until the context window shown in Fig. 56 opens. Expect an overall update time of at least five minutes.
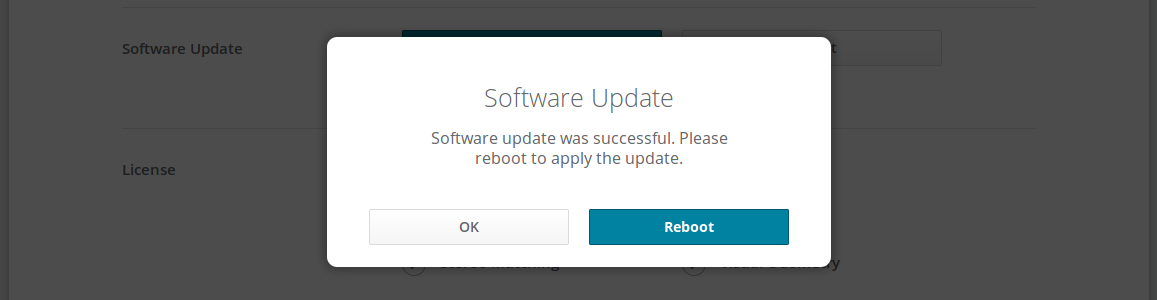
Fig. 56 Software update rebooting screen
Warning
Do not close the web browser tab which contains the Web GUI or press the renew button on this tab, because it will abort the update procedure. In that case, repeat the update procedure from the beginning.
- Step 3: Reboot the rc_visard.
To apply a firmware update to the rc_visard device, a reboot is required after having uploaded the new image version.
Note
The new image version is uploaded to the inactive partition of the rc_visard. Only after rebooting will the inactive partition be activated, and the active partition will become inactive. If the updated firmware image cannot be loaded, this partition of the rc_visard remains inactive and the previously installed firmware version from the active partition will be used automatically.
As for the REST-API, the reboot can be performed by the
PUT /system/rebootrequest.After having uploaded the new firmware via the Web GUI, a context window is opened as shown in Fig. 56 offering to reboot the device immediately or to postpone it. To reboot the rc_visard at a later time, use the Reboot button on the Web GUI’s System tab.
- Step 4: Confirm the firmware update.
After rebooting the rc_visard, please check the firmware image version number of the currently active image to make sure that the updated image was successfully loaded. You can do so either via the Web GUI’s System tab or via the REST-API’s
GET /system/updaterequest.Please contact Roboception in case the firmware update could not be applied successfully.
Restoring the previous firmware version
After a successful firmware update, the previous firmware image is stored on the inactive partition of the rc_visard and can be restored in case needed. This procedure is called a rollback.
Note
Using the latest firmware as provided by Roboception is strongly recommended. Hence, rollback functionality should only be used in case of serious issues with the updated firmware version.
Rollback functionality is only accessible via the rc_visard’s
REST-API interface
using the PUT /system/rollback request. It can be issued
using any HTTP-compatible client or using a web browser as described in
Swagger UI.
Like the update process, the rollback requires a subsequent device reboot
to activate the restored firmware version.
Warning
Like during a firmware update, all software components’ parameters will be reset to their defaults. Please make sure these settings are persisted on the application-side or client PC (e.g., using the REST-API interface) prior to executing the rollback.
Rebooting the rc_visard
An rc_visard reboot is necessary after updating the firmware or
performing a software rollback. It can be issued either
programmatically, via the rc_visard’s
REST-API interface
using the PUT /system/reboot request, or manually on the
Web GUI’s System tab.
The reboot is finished when the LED turns green again.
Updating the software license
Licenses that are purchased from Roboception for enabling additional features can be installed via the Web GUI’s System panel. The rc_visard has to be rebooted to apply the licenses.
Downloading log files
During operation, the rc_visard logs important information, warnings, and errors into files. If the rc_visard exhibits unexpected or erroneous behavior, the log files can be used to trace its origin. Log messages can be viewed and filtered using the Web GUI’s Logs tab. If contacting the support (Contact), the log files are very useful for tracking possible problems. To download them as a .tar.gz file, click on Download all logs on the Web GUI’s Logs tab.
Besides the Web GUI, the logs are also accessible via the rc_visard’s
REST-API interface
using the GET /logs and GET /logs/{log} requests.