Web GUI
The rc_visard’s Web GUI can be used to test, calibrate, and configure the device.
Accessing the Web GUI
The Web GUI can be accessed from any web browser, such as Firefox, Google Chrome, or Microsoft Edge, via
the rc_visard’s IP address. The easiest way to access the Web GUI is to simply double click on the
desired device using the rcdiscover-gui tool as explained in Discovery of rc_visard devices.
Alternatively, some network environments automatically configure the unique host name of
the rc_visard in their Domain Name Server (DNS). In this case, the Web GUI can also be
accessed directly using the URL http://<host-name> by
replacing <host-name> with the device’s host name.
For Linux and Mac operating systems, this even works without DNS via the multicast
Domain Name System (mDNS), which is automatically used if .local is appended to the
host name. Thus, the URL simply becomes http://<host-name>.local.
Exploring the Web GUI
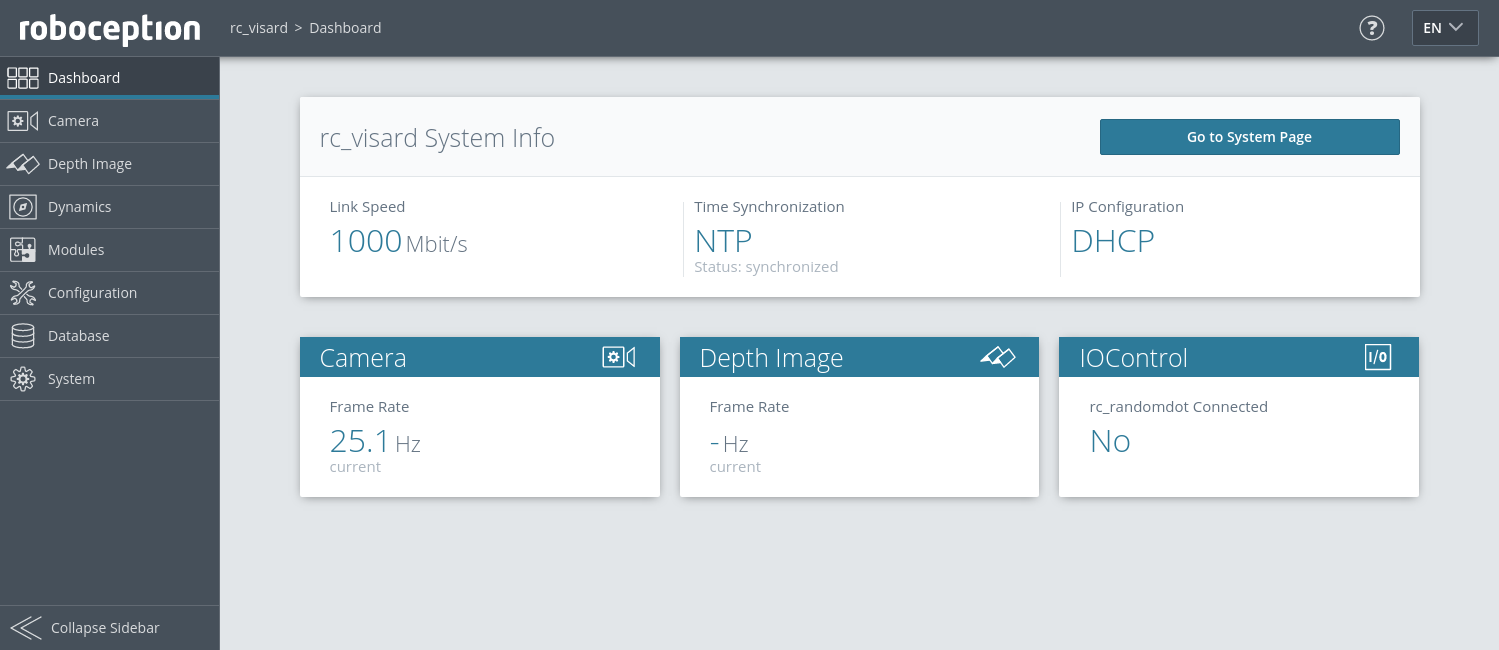
The Web GUI’s dashboard page gives the most important information about the device and the software modules.

Fig. 65 Dashboard page of the rc_visard’s Web GUI
The page’s side menu permits access to the individual pages of the rc_visard’s Web GUI:
- Camera
- shows a live stream of the rectified camera images. The frame rate can be reduced to save bandwidth when streaming to a GigE Vision® client. Furthermore, exposure can be set manually or automatically. See Parameters for more information.
- Depth Image
- shows a live stream of the left rectified, disparity, and confidence images. The page contains various settings for depth-image computation and filtering. See Parameters for more information.
- Dynamics
- shows the location and movement of image features that are used to compute the rc_visard’s egomotion. Settings include the number of corners and features that should be used. See Parameters for more information.
- Modules
- gives access to the detection modules of the rc_visard (see Detection modules).
- Configuration
- gives access to the configuration modules of the rc_visard (see Configuration modules).
- Database
- gives access to the database modules of the rc_visard (see Database modules).
- System
- gives access to general settings, device information and to the log files, and permits the firmware or the license file to be updated.
Note
Further information on all parameters in the Web GUI can be obtained by pressing the Info button next to each parameter.
Web GUI access control
The Web GUI has a simple mechanism to lock the UI against casual and accidental changes.
When enabling Web GUI access control via the System page, you will be asked to set a password. Now the Web GUI is in a locked mode indicated by the lock symbol in the top bar. All pages, camera streams, parameters and detections can be inspected as usual, but changes are not possible.
To temporarily unlock the Web GUI and make changes, click the lock symbol and enter the password. While enabling or disabling Web GUI access control affects anyone accessing this rc_visard, the unlocked state is only valid for the browser where it was unlocked and indicated by the open lock symbol. It is automatically locked again after 10 minutes of inactivity.
Web GUI access control can also be disabled again on the System page after providing the current password.
Warning
This is not a security feature! It only locks the Web GUI and not the REST-API. It is meant to prevent accidental and casual changes e.g. via a connected screen.
Note
In case the password is lost, this can be disabled via the REST-API delete ui_lock.
Downloading camera images
The Web GUI provides an easy way to download a snapshot of the current scene as a .tar.gz file by clicking on the camera icon below the image live streams on the Camera page. This snapshot contains:
- the rectified camera images in full resolution as .png files,
- a camera parameter file containing the camera matrix, image dimensions, exposure time, gain value and the stereo baseline,
- the current IMU readings as imu.csv file,
- a pipeline_status.json file containing information about all 3D-camera, detection and configuration nodes running on the rc_visard,
- a backup.json file containing the settings of the rc_visard including grippers, load carriers and regions of interest,
- a system_info.json file containing system information about the rc_visard.
The filenames contain the timestamps.
Downloading depth images and point clouds
The Web GUI provides an easy way to download the depth data of the current scene as a .tar.gz file by clicking on the camera icon below the image live streams on the Depth Image page. This snapshot contains:
- the rectified left and right camera images in full resolution as .png files,
- an image parameter file corresponding to the left image containing the camera matrix, image dimensions, exposure time, gain value and the stereo baseline,
- the disparity, error and confidence images in the resolution corresponding to the currently chosen quality as .png files,
- a disparity parameter file corresponding to the disparity image containing the camera matrix, image dimensions, exposure time, gain value and the stereo baseline, and information about the disparity values (i.e. invalid values, scale, offset),
- the current IMU readings as imu.csv file,
- a pipeline_status.json file containing information about all 3D-camera, detection and configuration nodes running on the rc_visard,
- a backup.json file containing the settings of the rc_visard including grippers, load carriers and regions of interest,
- a system_info.json file containing system information about the rc_visard.
The filenames contain the timestamps.
When clicking on the mesh icon below the image live streams on the Depth Image page, a snapshot is downloaded which additionally includes a mesh of the point cloud in the current depth quality (resolution) as .ply file.
Note
Downloading a depth snapshot will trigger an acquisition in the same way as clicking on the “Acquire” button on the Depth Image page of the Web GUI, and, thus, might affect running applications.